Get Started With Ready Player Me's Game-Ready Avatar Animation Library in Unity
Building 3D animations from scratch can be a challenge. That’s why we launched the Ready Player Me Game-Ready Animation Library. We provide 200+ high-quality motion-captured animations retargeted to Ready Player Me character armatures. The best part? You can start using them for free in your projects, starting today.
Setup Ready Player Me Avatar SDK package and import an avatar to your project
If you’ve already got the Ready Player Me package imported into your project and your avatar loaded, you can skip this step and dive into the next section to learn more about how to integrate the animations.
For those starting fresh, let’s get you set up:
1. Open your Unity project or create a new one, and import Ready Player Me Unity Avatar SDK into it. You can visit the Ready Player Me GitHub organization here and copy the Git URL of the GitHub repository.
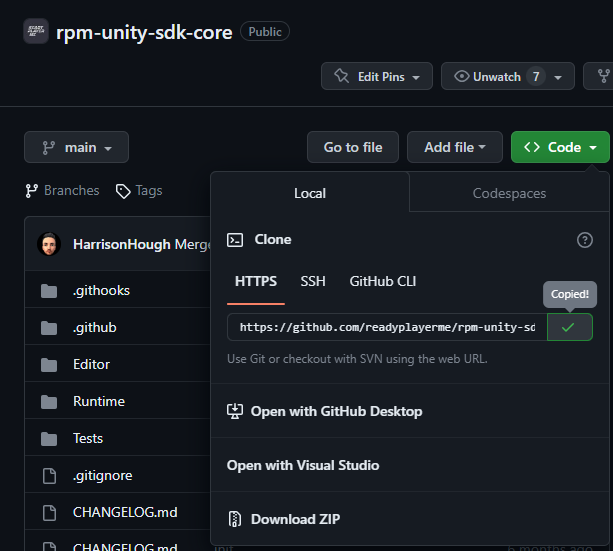
Copy the Git URL of the Ready Player Me SDK
2. In your Unity project, go to Window > Package Manager > + Button > Add package from the Git URL menu, paste the copied URL into it, and click the add button.
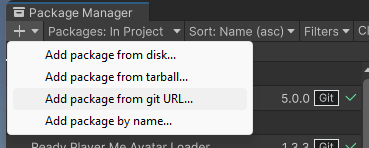
Add package from the Git URL
3. The packages will take about 10 seconds to load, and then you can see the Ready Player Me menu at the menu bar. If it is your first time using Ready Player Me, you will be shown the Setup Guide. After finishing the setup, you can visit readyplayer.me to make yourself an avatar and copy its URL.
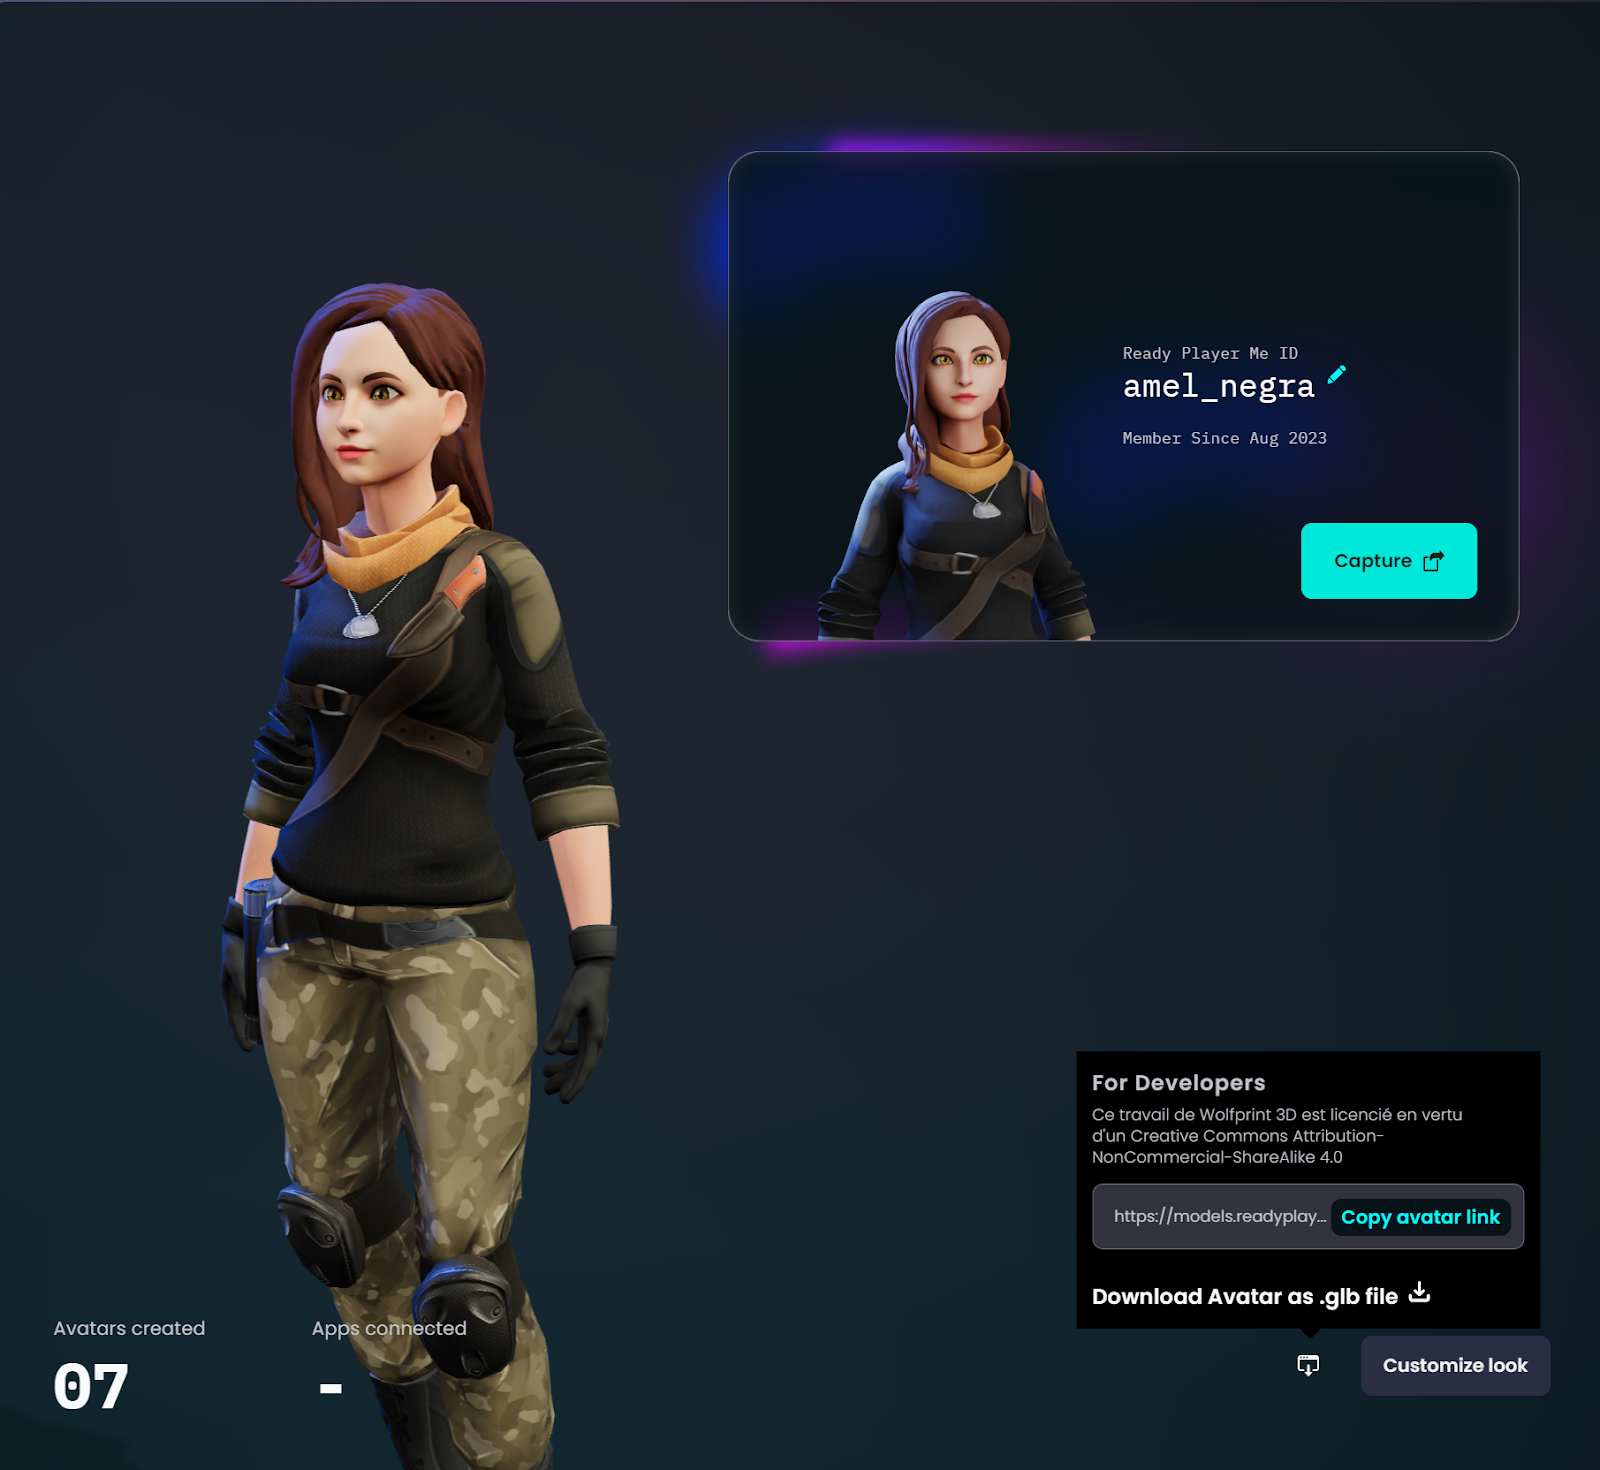
Copy the URL of your avatar on the Ready Player Me website.
4. Then, return to Unity and click on Ready Player Me > Avatar Loader menu, paste your avatar's URL in the text field and click the Load Avatar button.
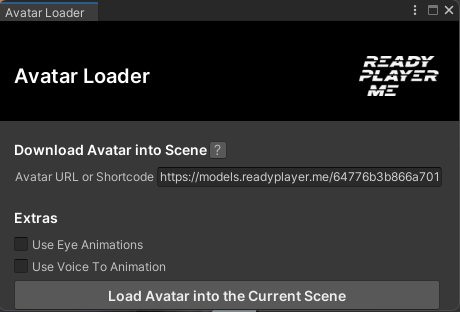
Paste your avatar URL and load your avatar.
Choose your avatar animations
Time to bring your avatar to life with animations! To get started, head over to the animation library's Git repository. Once you're there, you'll notice two main folders: one for Feminine animations and another for Masculine animations.
Inside each folder, you can find the fbx folder that contains the animations we want to integrate into Unity. As you explore, you'll find various animation categories such as dance, expression, idle, and locomotion.
We will be using the dance animations as an example today. When you open the category folder, scroll down and you will be able to see a preview of all the animations of that category. This makes it easier for you to pick up the ones you need.
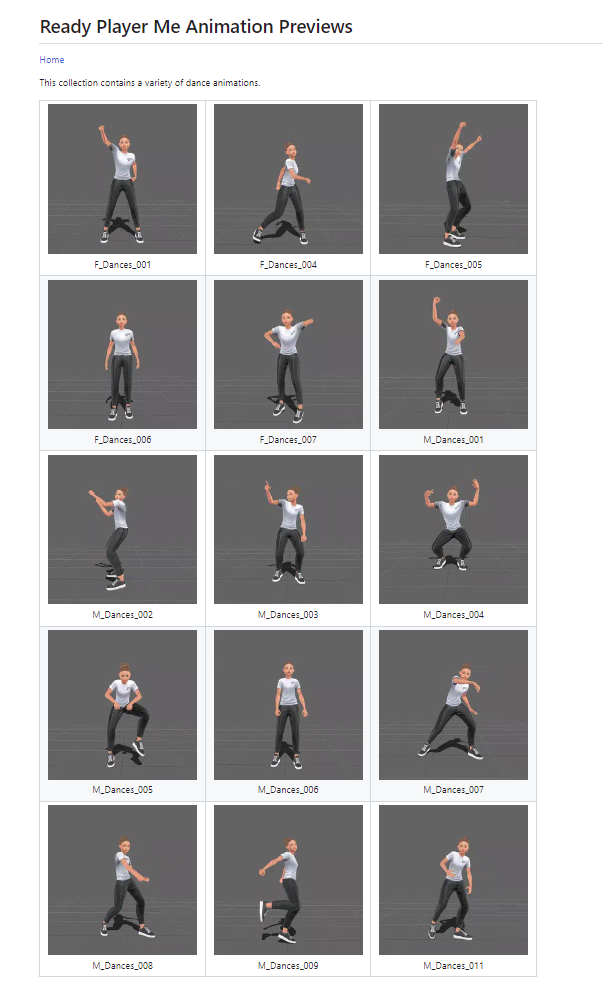
Ready Player Me animations preview
Once you've selected the animations you want to use, click on each animation to access its corresponding FBX file and download it.
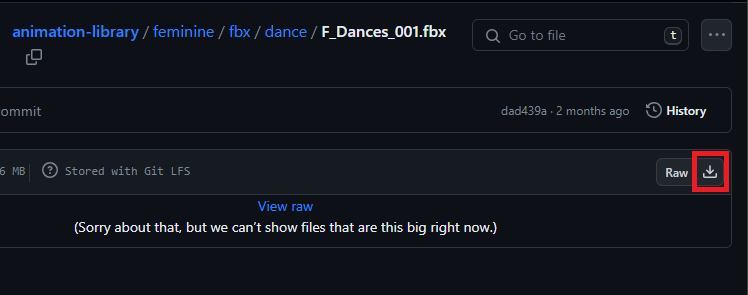
Ready Player Me animation download
Import your animations to the Unity SDK
With the animations files downloaded, in Unity, create a new folder under Assets called Animations then drag and drop all the animations we downloaded into that folder.
Now we only need to do 3 steps to be able to use these animations:
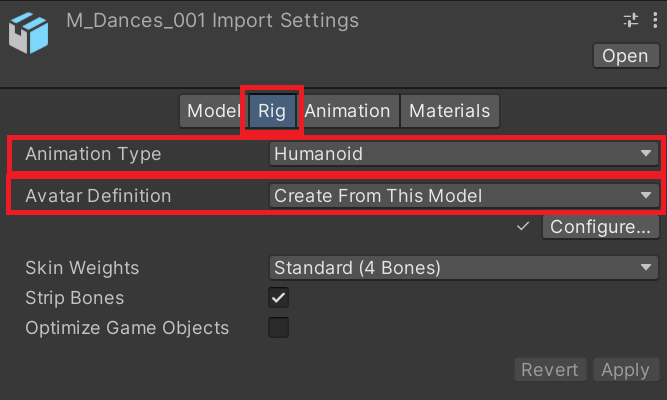
1. Select one of the FBX animation files and go to import Rig tab settings, set the Animation Type to Humanoid, and choose the Create From This Model option for the Avatar Definition.
2. Now select the other animation files to use and go to import Rig tab settings, set the Animation Type to Humanoid, then choose the Copy From Other Avatar option for the Avatar Definition, and use the avatar pose we just created in step one.
![]()
3. With the import settings still open, switch to the Animation tab, and for each animation, set the Loop Time to true only if it’s a looping animation like a walking loop. Then make sure that both the Root Transform Rotation: Bake Into Pose and Root Transform Position (Y): Bake into pose are set to true.
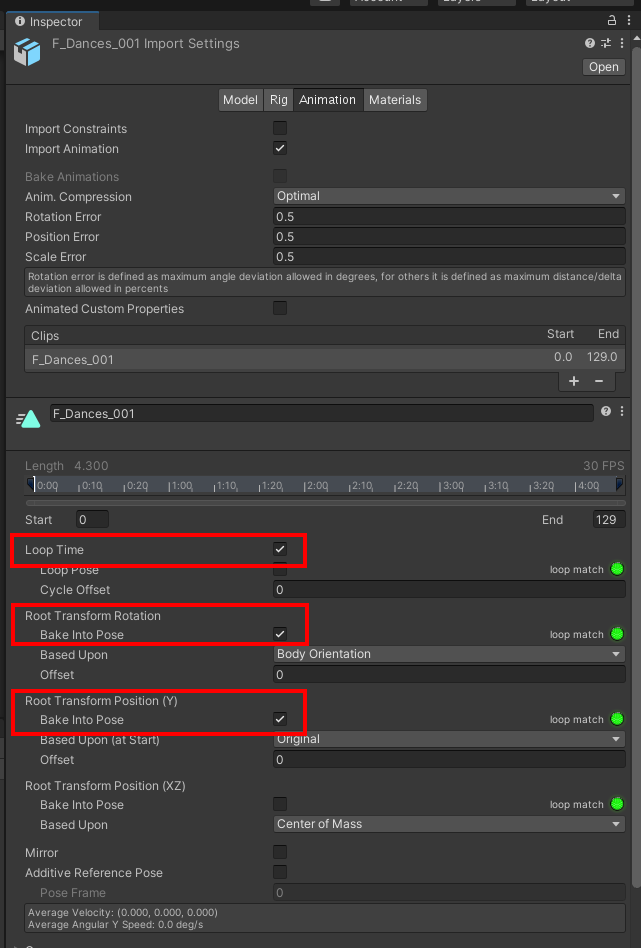
Check the Loop Time, and bake pose of Root Transform Position and Location
Animate your avatar using the Animator Controller
Now that we successfully imported our avatar and animations, let’s put it together and see the avatar in action.
1. Create a new Animator Controller (Right-click under Assets, select Create -> Animator Controller). Let’s name it MainDancer_F.
2. Double-click the Animator Controller, and drag and drop the imported animation in the open Animator editor tab. This action will add a new state with the same name as the animation file FBX.
3. Select the newly created state and in the inspector, rename it to Dance since we are using a dance animation for this example.
4. Select your avatar previously loaded in the scene, in the inspector, you can see the Animator Controller component. Under the Controller property, attach the Animator Controller asset we’ve just created.
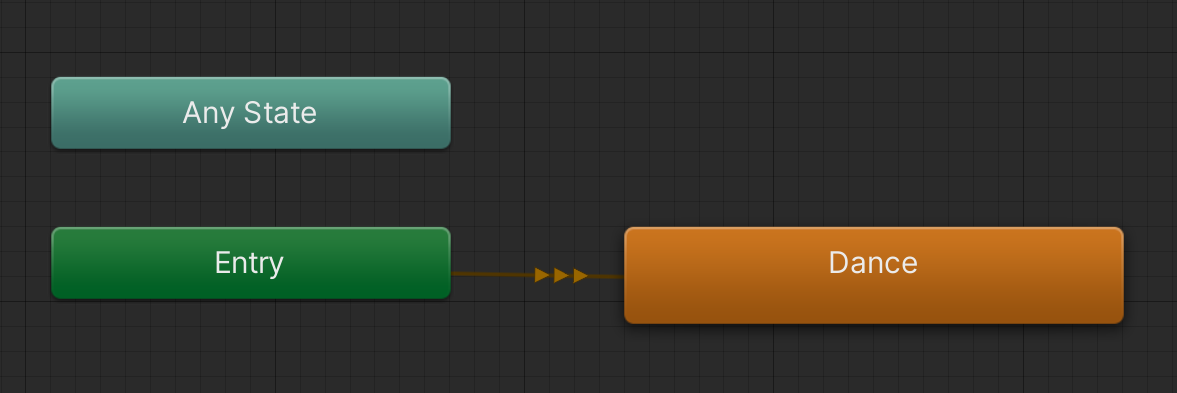
Animator Controller after adding Dance State
If you press play now, you should be able to see your character already dancing!
From here, you can keep adding animations the same way, and using the Animator parameters you can transition between the different states using the parameters values as transition conditions to move from one state to another. We will see an example of using parameters in the following section.
Using multiple avatar animations for one state
For one state, multiple animations can be used. In the previous step, we used one dance animation from the package. However, Ready Player Me library offers more than ten animations for the dance so why not use them all! To do so:
1. Right-click in the Animator window and select Sub-State Machine, name it Dance. This will replace the previous Dance state we had, so you can go ahead and remove that state.
2. Double-click on the Sub State Machine opening a new empty Animator view. From the Animation folder under Assets, select all the dance animations you want to use and drag and drop them into the Animator Window. You can reposition the states for better visibility.
3. Returning to the base layer, let’s add an Idle intermediate state between Entry and Dance. Drag and drop the Idle animation into the Animator window. Now select the state and rename it to Idle.
4. Right-click on the new Idle state and select Set as Layer Default State. This means that the Idle animation will be played by default.
5. Right-click Idle state then select Make Transition and connect it to the new Sub State Machine we created. It will show you the option to transition to the StateMachine Dance or a state with each dance we added as an option. We want to select the StateMachine as we are not targeting one specific animation but all the animations of the Sub State Machine we added. We also want to be able to move back from Dance to Idle state so we will add a new transition from Dance state to Idle state.
6. Now we want to add conditions to move from one state to another. Let's add a new Trigger parameter that we name Dance and we also add a new Int parameter that we call DanceIndex.
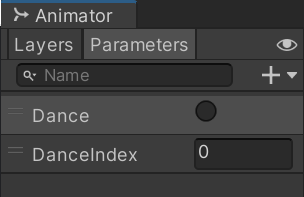
Animator parameters used
7. Select the Transition from Idle to Dance, we can add Dance trigger under the conditions, make sure to also set Has Exit Time to false.
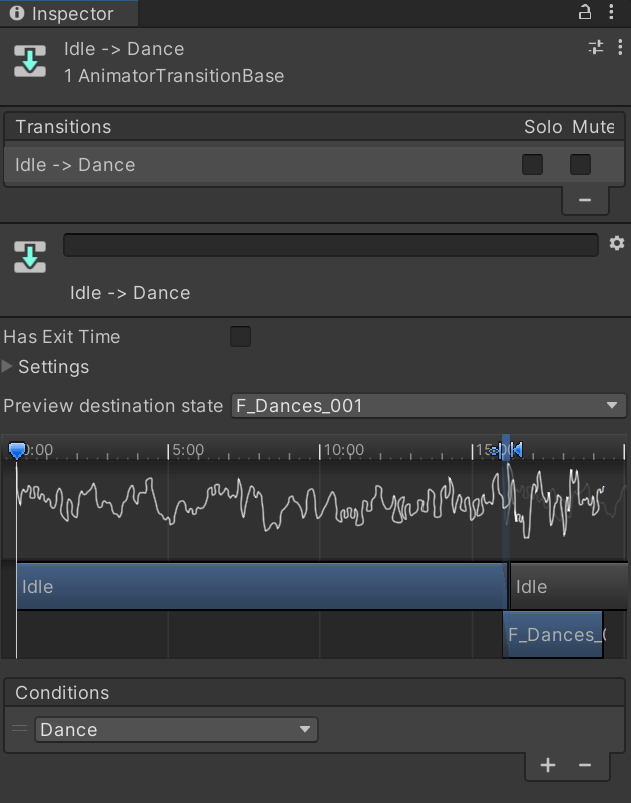
Idle to Dance transition condition

Animator Controller for the base layer
Now let’s focus on the Sub-State Machine:
1. Double-click on the Dance state to access the Dance Sub State Machine within the Animator Controller view window. You will notice that we have a transition from Entry state to the first dance animation by default.
2. Add transitions from Entry to each of these dance animation states as well. Similarly, add transitions from these states to Exit enabling to leave the Sub State Machine and return to the main State Machine.
3. For each transition, we will add a condition. Now the goal is to switch from one dance to another using the DanceIndex. When the index value equals 0, the first dance animation will play. For the other dances, apply a similar logic. Set conditions using the DanceIndex parameter with 'Equals' and the corresponding value (from 1 to 9, reflecting the different dance animations).
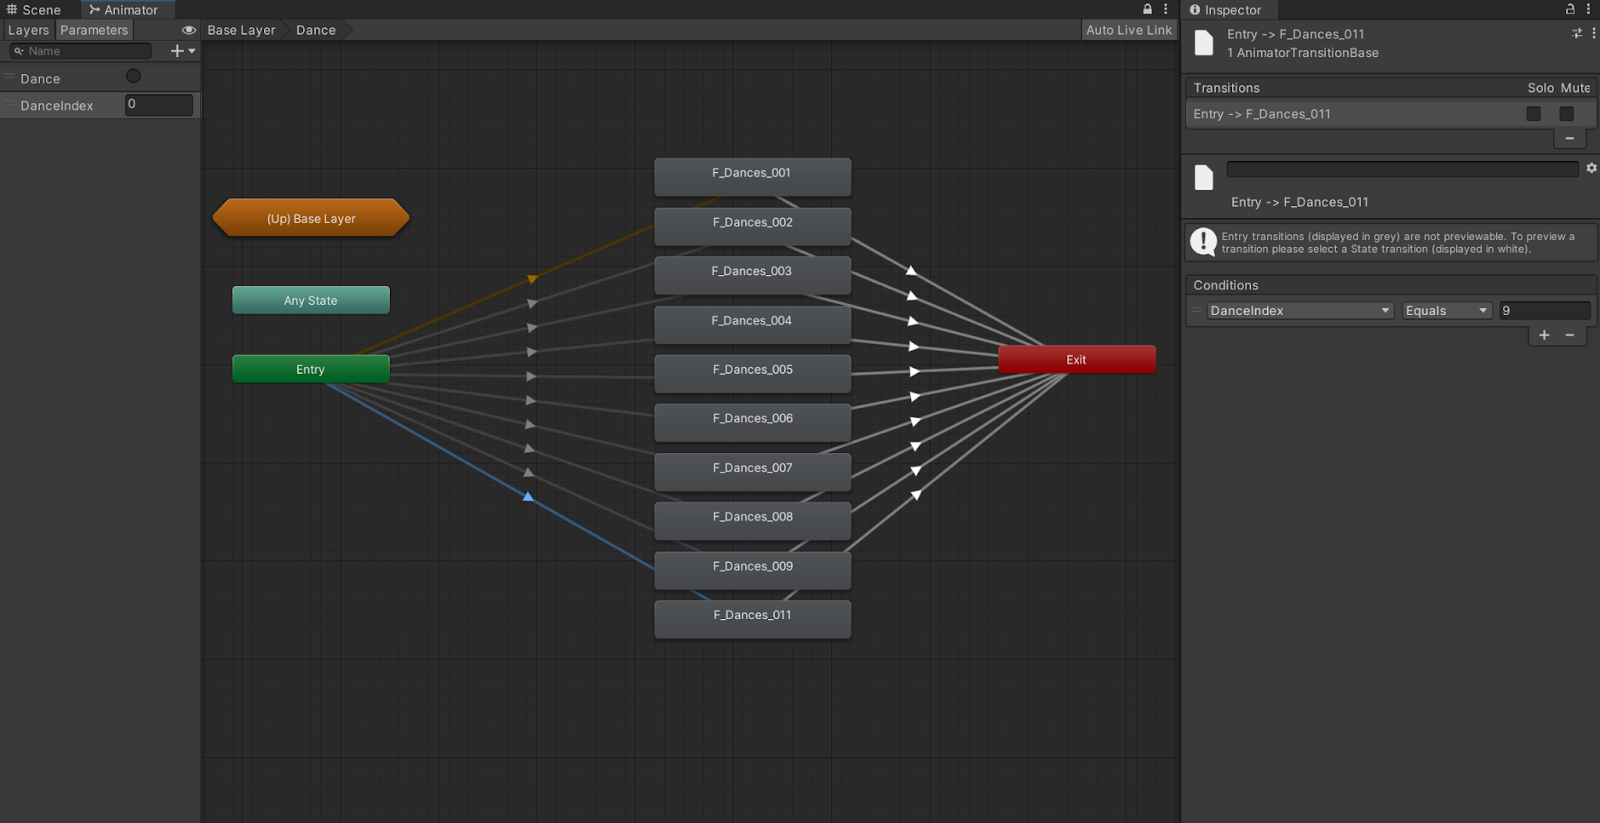
Animator Controller for dance sub-state machine
4. Now we would like to be able to switch from one dance to another using the DanceIndex. For this matter, we will create a script attached to our avatar called DanceController.
using System.Collections;
using ReadyPlayerMe.Core;
using UnityEngine;

public class DanceController : MonoBehaviour
{
    [SerializeField] private Animator animator;
    private float currentClipLength;
    private int currentDanceIndex;

    private void Start()
    {
        animator = GetComponent<Animator>();
        StartCoroutine(StartDancing());
    }

    private IEnumerator StartDancing()
    {
        currentDanceIndex = Random.Range(0, 10);
        animator.SetInteger("DanceIndex", currentDanceIndex);
        animator.SetTrigger("Dance");
        //We wait 1 second just to make sure the Animator finished transitioning from one state to another
        yield return new WaitForSeconds(1);
        StartCoroutine(WaitForAnimationToEnd());
    }

    private IEnumerator WaitForAnimationToEnd()
    {
        currentClipLength = animator.GetCurrentAnimatorClipInfo(0)[0].clip.length;
        yield return new WaitForSeconds(currentClipLength);
        //Once the current dance animation finishes, we play another dance again
        StartCoroutine(StartDancing());
    }
}
Do I have to do this again if I want to use a masculine avatar?
So far, we've been using feminine animations. But what if you want to introduce a masculine dancer into the scene? The good news – you won't have to repeat the entire process. You only need to follow the import animations steps for the masculine animations this time. Then the animations will work seamlessly using the Animator Override Controller.
Right-click on the Assets folder under the Animator Controller folder and go to Create -> Animator Override Controller. This will create a new Animator, let’s call it MainDancer_M. In the controller field, choose the MainDancer_F, and then all you need to do is add the animations you just imported into the override fields.

Animator Override Controller
Now just add this new Animator Override Controller to the Controller field of the Animator component on the masculine avatar. Make sure to attach the DanceController script to the newly loaded avatar so we can play the dances randomly.
Now press play and see both avatars dancing!
Assigning the Animator Controller at run time
For now, we’ve been assigning the Controller manually depending on the avatar's gender. However, it is possible to automate the controller assignment using a script. Start by adding the 2 RuntimeAnimatorController properties to our DanceController script.
[SerializeField] private RuntimeAnimatorController  animatorControllerF;
[SerializeField] private RuntimeAnimatorController  animatorControllerM;
Then on the start method, we would like to assign the appropriate Controller at runtime depending on the OutfitGender property from the AvatarMetadata. This can be accessed in the current script since the AvatarData script is attached to our previously loaded avatar by default.
 private void Start()
    {
        AvatarData avatarData = GetComponent<AvatarData>();
        animator = GetComponent<Animator>();
        if (avatarData.AvatarMetadata.OutfitGender == OutfitGender.Masculine)
        {
            animator.runtimeAnimatorController  = animatorControllerM;
        }
        else
        {
            animator.runtimeAnimatorController  = animatorControllerF;
        }
        StartCoroutine(StartDancing());
    }
Then before we press play to see this in action, reference the 2 Animator Controllers we previously created into the DanceController script component attached to the avatar.
As we plan to use this script again with multiple avatars in the scene and to avoid having to drag and drop these references again, you can select the script file and add the two references there in the inspector. Now every time you add this script to an avatar, the references will be already set for you.
Suppose you would like to assign the Animator Controller automatically when loading an avatar at run time. In that case, you can still follow this example by adding these lines of code to the avatar loader script instead and more specifically within the OnCompleted callback function.
Animate multiple avatars in your scene
We want to make many avatars dance in the scene. I have made multiple avatars in the Ready Player Me Hub. All I had to do was add the DanceController script to the loaded avatars and it will just work! You can imagine this in the context of a multiplayer game as well.
Add some music and camera effects
As a final touch to our scene, we added some copyright-free music and a few virtual cameras with a handheld camera effect using the Cinemachine package. We also attached a simple script to the camera to change the virtual camera from one to the other every few seconds. This will make our scene more dynamic with the dance moves. You can access this project in GitHub.
Let us know in the Ready Player Me forums if you have any questions. We would love to hear about how you integrated the library animations into your project and what animations you want to see next. And feel free to suggest other topics you would like us to cover in future blog posts.