Smart NPCs with ChatGPT and Ready Player Me Unity SDK
In this blog post, we will explore the process of creating NPC agents using Ready Player Me avatars and leveraging the conversational abilities of OpenAI ChatGPT. Before we start, for this project to work, you will need an OpenAI account and an API Key to use in this project and Unity 2020.3 or a newer version.
We will create a new Unity project and import Ready Player Me Unity SDK into it. You can visit the Ready Player Me GitHub organization here and copy the Git URL of the GitHub repository. The Git URL of the package is https://github.com/readyplayerme/rpm-unity-sdk-core.git
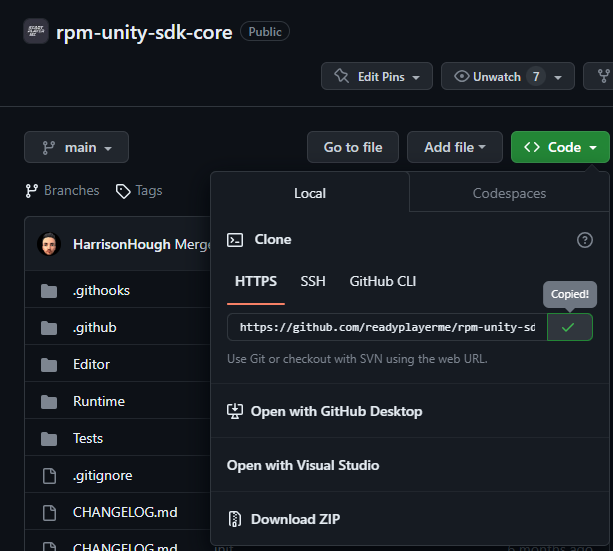
Copy the Git URL of the Ready Player Me SDK
In your Unity project, go to Window > Package Manager > + Button > Add package from the Git URL menu, paste the copied URL into it, and click the add button.
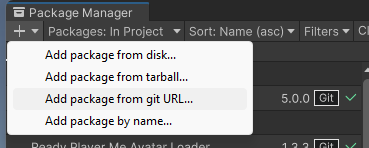
Add package from the Git URL
The packages will take about 10 seconds to load, and then you can see the Ready Player Me menu at the menu bar. If it is your first time using Ready Player Me, you will be shown Setup Guide. After finishing the setup, you can visit readyplayer.me to make yourself an avatar and copy its URL.
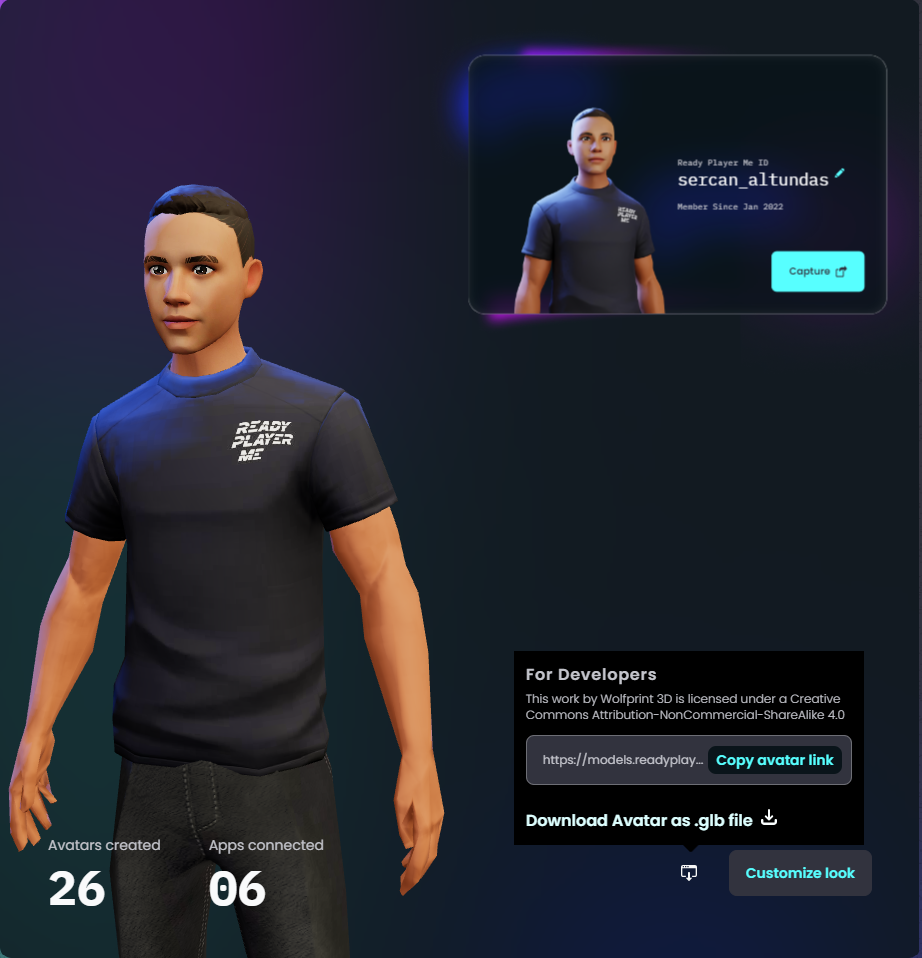
Copy the URL of your avatar on Ready Player Me website.
Then, return to Unity and click on Ready Player Me > Avatar Loader menu, paste your avatar's URL in the text field, and click the Load Avatar button.
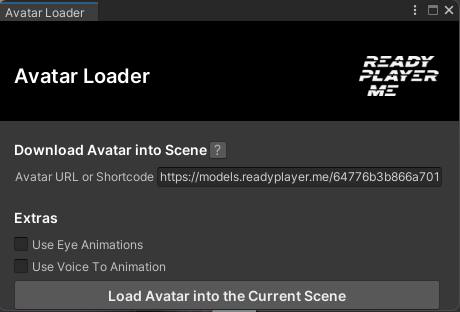
Paste your avatar URL and load your avatar.
Once your avatar is imported and in the scene, you can adjust the camera and light to get a good view of your avatar. And now, we can start working on our UI. For this project, I want to go with a Text for displaying the users and AI assistant's messages, an Input Field for typing the user's input, and a send Button for initiating the request to the OpenAI chat completion endpoint
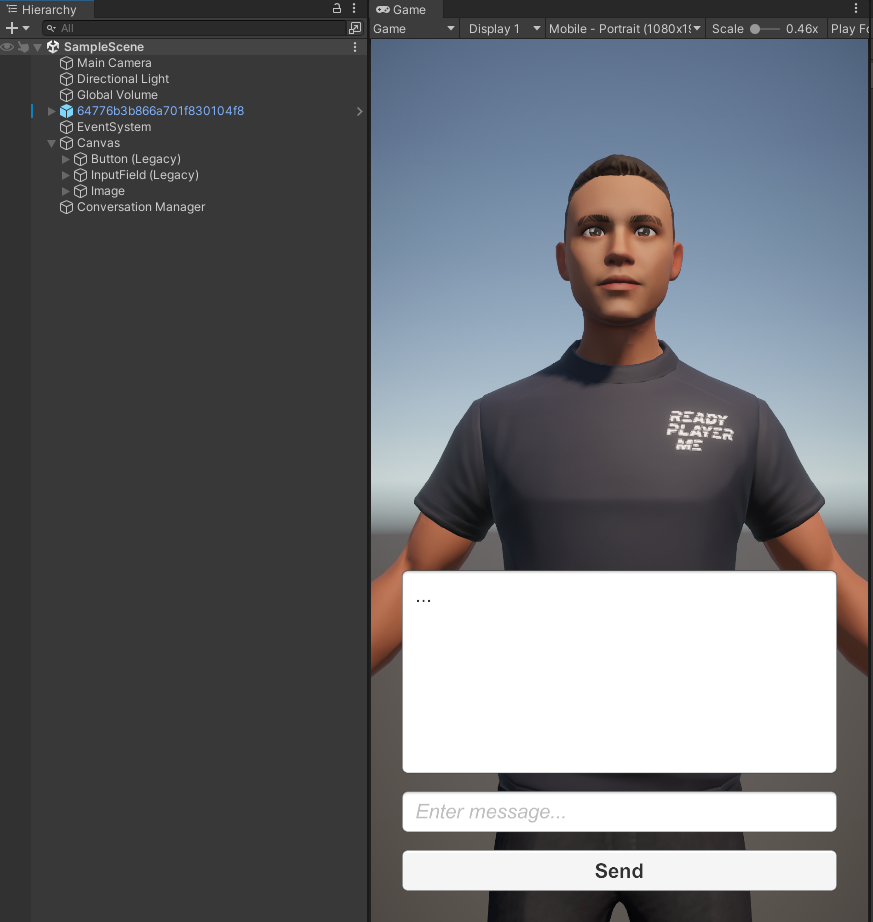
Create a basic UI consisting of Text Area, Input Field and a Send Button.
Now we are ready to bring another package into the project to establish the connection with ChatGPT. Visit the OpenAI Unity package here in GitHub and import the Unity package following the similar steps we used for Ready Player Me SDK. The Git URL of the package is https://github.com/srcnalt/OpenAI-Unity.git
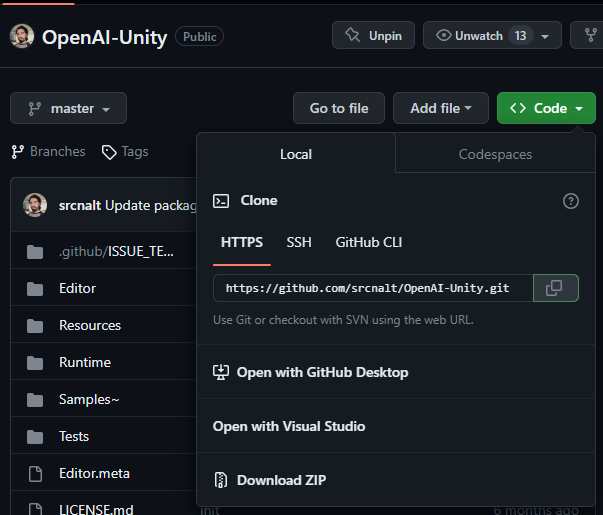
Copy the Git URL of the OpenAI Unity package.
Let's create an Empty Game Object in the scene called Conversation Manager and a C# script with the same name, and attach this script to the game object. This script will handle our UI interactions and make the ChatGPT requests.
using System;
using UnityEngine;
using UnityEngine.UI;

public class ConversationManager: MonoBehaviour
{
	[SerializeField] private Button sendButton;
  [SerializeField] private InputField inputField;
  [SerializeField] private Text conversationText;

  private void Awake()
  {
  	sendButton.onClick.AddListener(OnSendButtonClicked);
  }

  private void OnSendButtonClicked()
  {
  	var message = inputField.text;
    conversationText.text = $"You: {message}{Environment.NewLine}";
    inputField.text = string.Empty;
  }
}
The code above will handle most of our UI interactions. Select the Conversation Manager game object and set the UI elements on the component with the same name.
We can now bring the logic for requesting ChatGPT and save message history in a list of chat messages. First, we will create an OpenAIApi object which will make the requests. In the constructor of the OpenAIApi object, pass your Open AI API Key as a string.
Then create a ChatMesage list and add the first message item as our instruction for the system, which will have the role "system" and the prompt content "You are a Ready Player Me avatar, who exists in the metaverse." this is going to help the ChatGPT contain its personality in the given context.
Then once the user clicks on the send button, we will first add the user’s input to the list of chat messages with the role "user" and make our request. And once we receive the response from ChatGPT, we can extract the returned text reply from the returned object and append it to our chat message list to keep a conversation history.
public class ConversationManager : MonoBehaviour
{
	...
	private OpenAIApi openai = new OpenAIApi("sk-abc123...");
	private List messages = new List();

	private void Awake()
	{
		...

		messages.Add(new ChatMessage()
		{
			Role = "system",
			Content = "You are a Ready Player Me avatar, who exists in the metaverse.",
		});
	}

	private async void OnSendButtonClicked()
	{
		...
		messages.Add(new ChatMessage()
		{
			Role = "user",
			Content = message,
		});

		var resp = await openai.CreateChatCompletion(new CreateChatCompletionRequest()
		{
			Messages = messages,
			Model = "gpt-3.5-turbo",
			MaxTokens = 32,
		});

		var reply = resp.Choices[0].Message.Content;

		messages.Add(new ChatMessage()
		{
			Role = "assistant",
			Content = reply,
		});

    conversationText.text += $"AI: {reply}{Environment.NewLine}";
    sendButton.interactable = true;
	}
}
At this stage, we can make our avatar more lively using some animations. Luckily Ready Player Me also provides an entire open-source animation library! You can visit the Ready Player Me animation library here and pick your desired animations. In this example, we will use the M_Standing_Idle_Variations_002.fbx and M_Talking_Variations_001.fbx to have two states in our animator Idle and Talking. If you will use a female avatar, you can use the female variations of these animations which starts with "F_" prefix.
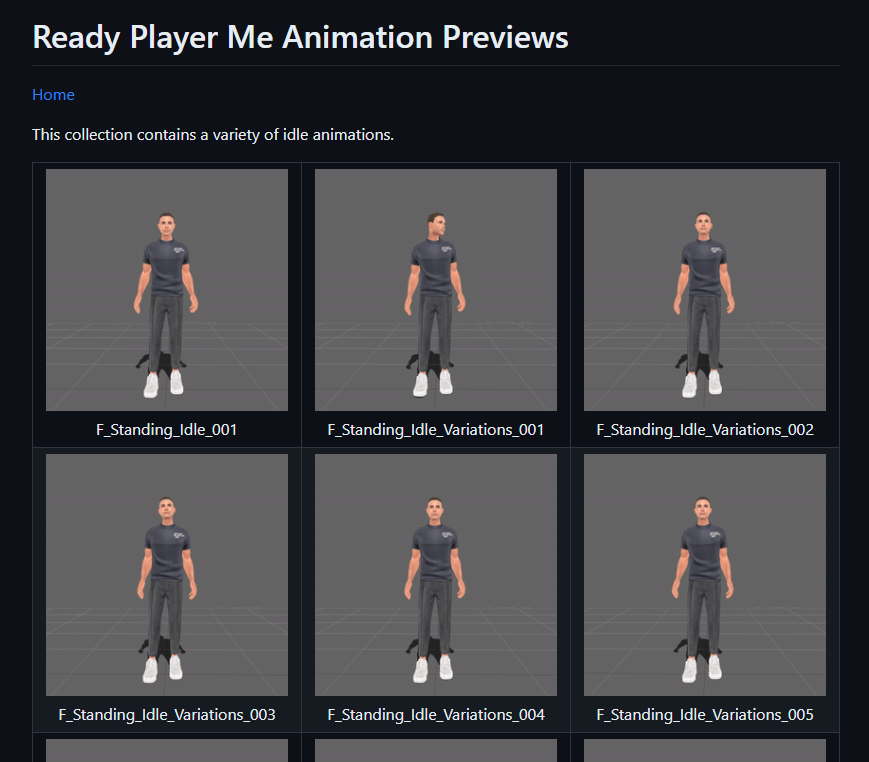
Ready Player Me Animation Library
Once you downloaded and brought the animations into your project, select the FBX files, and in the Rig tab, select Animation Type Humanoid to select the animations in the Animation tab, and check Loop Time.
After that, we can create an Animation Controller to use these animations. In this animation, the controller will have two states, Idle and Talking, and a Talk parameter to trigger when we receive the reply from ChatGPT. And finally, we will uncheck the Has Exit Time on the transition from Idle to Talking, so when the talking state is triggered, it will not wait for the Idle animation to finish.
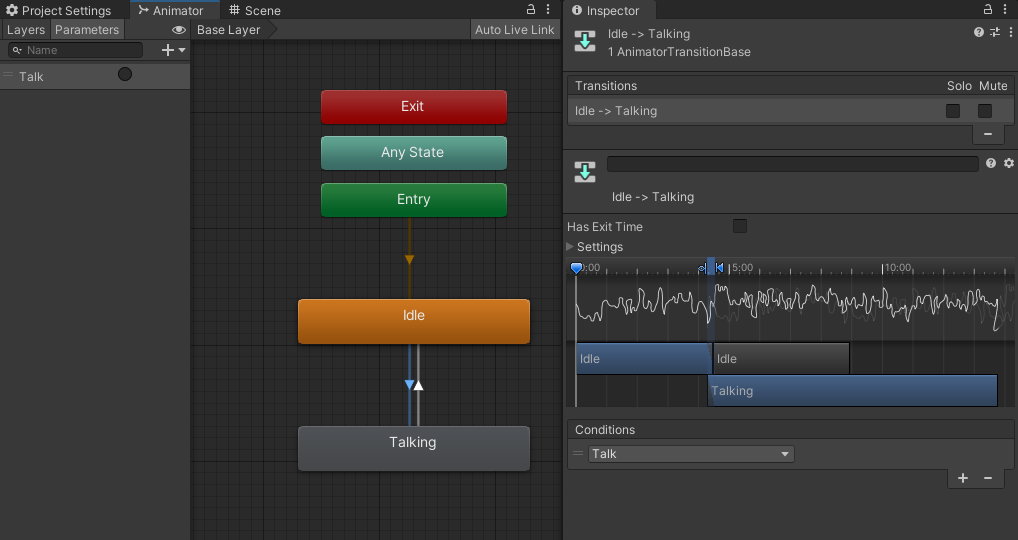
Animation Controller setup for Smart NPC
Finally, we can attach this animation controller to our avatar’s Animator component, get a reference in our Conversation Manager, and trigger the Talk parameter once the reply is received.
public class ConversationManager : MonoBehaviour
{
		...
    [SerializeField] private Animator animator;


    private async void OnSendButtonClicked()
    {
        ...
        animator.SetTrigger("Talk");
    }
}
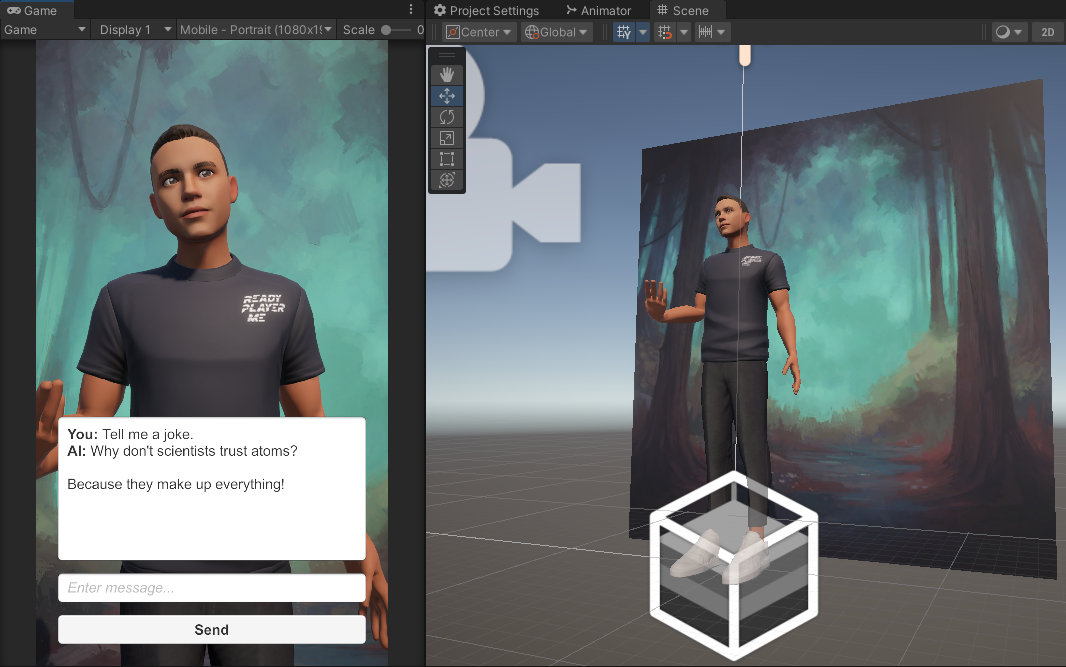
And with all this, we should have a small AI conversation app finished. You can access the project from this URL: https://github.com/readyplayerme/Unity-OpenAI-Example
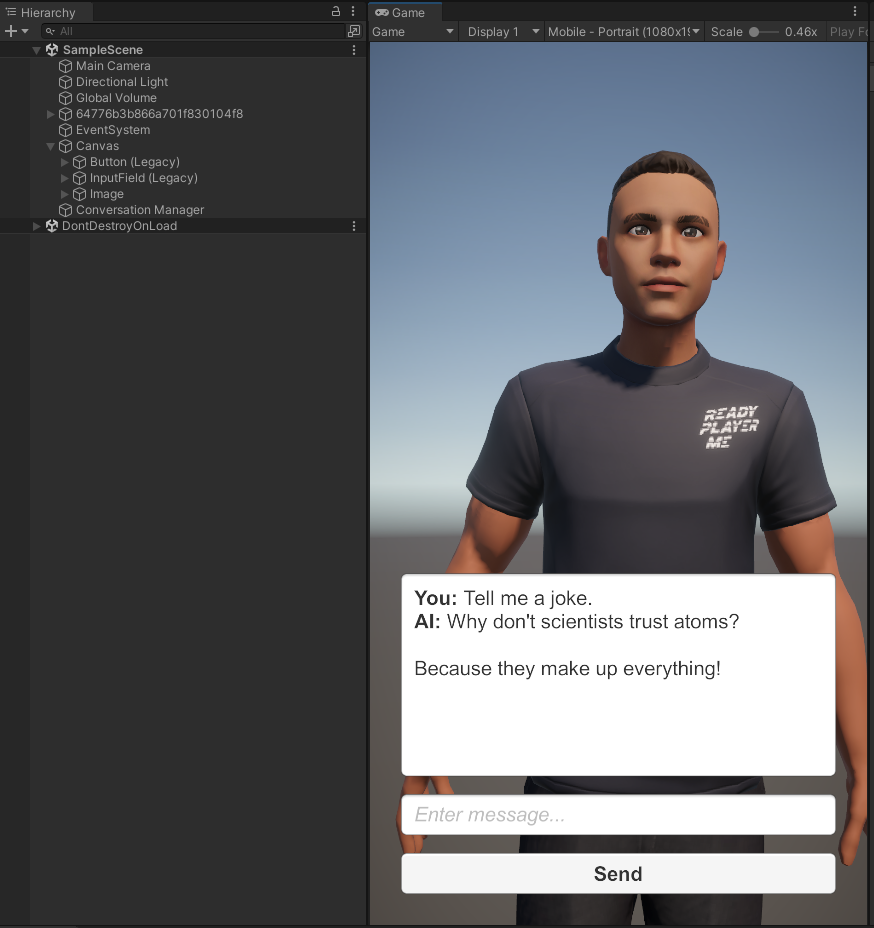
Final look at the project
Let us know in the Ready Player Me Developers Forum if you have any questions. We would love to hear about how you integrated the avatars into your project. And feel free to suggest other topics you would like us to cover in future blog posts.